In Part One, we did prep work and underpainting. In Part Two, we did negative painting and some highlighting on the tree trunks. Now, I needed to blend out the stark white on the lower trees, paint upper trees, balance out the values with final glazes, and add the final "tender touches."
To knock down the gesso white on the lower trunks, I used an almost-dry foam brush and added light glazes in local color. That is, where the underpainting was blue, I glazed over the white with blue. Where the underpainting was burnt umber, I glazed over the white with burnt umber. (This doesn't actually result in polka-dot trees, although it seems like it would.) Here's a before-and-after detail:


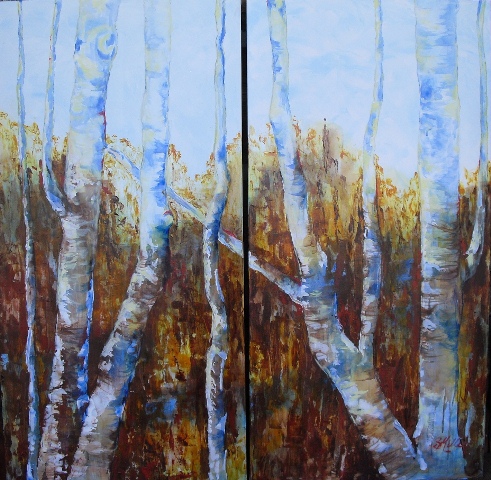
Note that, except for wisps around the edges, most of the tree trunk is not painted. The trunk colors are the original blue/brown/yellow underpainting showing through. If I was working in watercolor (acrylics versus watercolor again!), I'd have made the underpainting even lighter and used some mid-tones to model the trunks.
Now, the bottom trunks were largely done but the tops were absent. The sky looks very white in these photos, but it's actually a subtle mix of cerulean blue and white.
I used a very watered-down ultramarine blue, a small foam brush, and a chunk of kitchen sponge to lightly model the trees against the sky. I didn't want them too dark, because I wanted the primary emphasis on the lower trunks:

The trunks looked nice but needed heft and highlights. Because the sky behind the trunks was very light and cool, I switched to a cooler color - cadmium yellow pale - and liberally mixed it with white gesso. I laid that on pretty thickly with a foam brush:

Here, i stopped a bit. Usually I am a compulsive overworker. At each stage, I was muttering to myself the good painting adage, "Stop when you feel it's not quite finished." After some pacing and peering, I went back in with the final touches. These are too subtle to photograph, but for anyone trying to step-by-step with me, here they are:
1. Carried some "sparkles" of the cad yellow/white light down into the lower tree trunks . . . just a few, though!
2. Used a little burnt umber to lose the edges here and there in the lower tree trunks.
3. Added very tiny flashes of "surprise" color here and there; in this case, cadmium red.
An instructor of mine once called these "tender touches" - I've also heard them called "jewelry," as a reminder that they should be applied with some restraint.
So . . . trees! Now I let them dry, then went back in with a glazing medium for a sealing topcoat. Late last night, I put on the hardware. The painting won't actually be bone-dry for a couple weeks, but it's safe to transport. So transport it I will . . . with dispatch!
More lovely news: I already have a purchase offer on the painting. So Mom was right, as Moms so often are. Thanks, Mom!
I must here add a coda about soul. I didn't expect to feel connected to this painting. But it had to be done so quickly, and from such a devil-may-care place, that it turned out to be a really joyous exercise. I had to rely on what I knew, instead of fussing and worrying about whether I was doing things "right." As a result, it ended up being painted very much from the heart rather than the head.
I guess there's a moral to this Tale in Three Parts: sometimes love sneaks up on you.
No comments:
Post a Comment